11.5. Add a Message to the Centre/Service's Bills
The Spike software program allows you to write a message to be printed on each bill. For example General Meeting on..., Don't forget the working bee next Saturday or simply Merry Christmas and a wonderful New Year!. You can change the message each week or set a series of messages in advance.
Steps to: Add a new Message
Select menu BOOKING+BILLING / OTHER / MESSAGES ON BILLS.
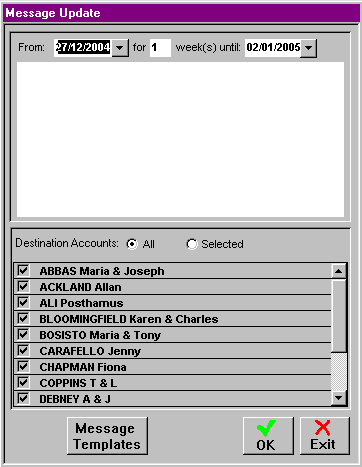
Bring forward the new message window by double clicking on the blank railway line.
Enter the date range that you wish the message to run on all accounts or selected accounts.
Type in your new message or click on MESSAGE TEMPLATE to select an existing standard message by clicking on the USE THIS TEMPLATE button.
Click in the radio button for ALL or SELECTED accounts.
If you are selecting a few individual accounts place a tick next to the names you require.
Select OK.
Steps to: Use an existing message
Select menu BOOKING+BILLING / OTHER / MESSAGES ON BILLS.
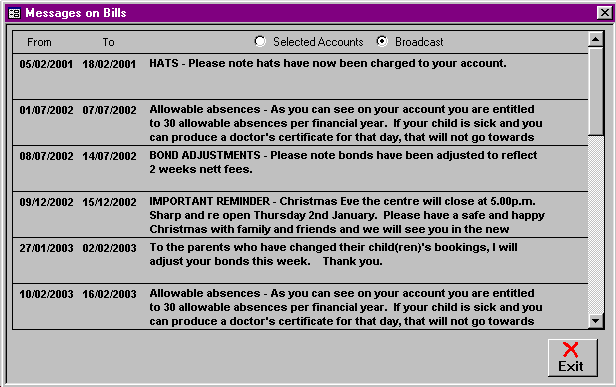
Select the appropriate radio button for SELECTED ACCOUNTS or BROADCAST.
Double click on the message you wish to re-use.
Enter the date range that you wish the message to run on all accounts or selected accounts.
Select OK.
Steps to: Add a Message to an Individual Account.
Select menu BOOKING+BILLING / ACCOUNT.
From the Draw Down Selection List select the Account holder to which you want to add an individual message.
Select the MESSAGES Tab.
Double click on the empty railway line.

Enter the date range that you wish the message to run.
Type in your new message or click on MESSAGE TEMPLATE to select an existing standard message by clicking on the USE THIS TEMPLATE button.
Select OK.
Steps to: Create a Message Template.
Select menu BOOKING+BILLING / OTHER / MESSAGES ON BILLS.
Double click on the empty railway line.
Click on MESSAGE TEMPLATE.
Double click on the empty railway line.
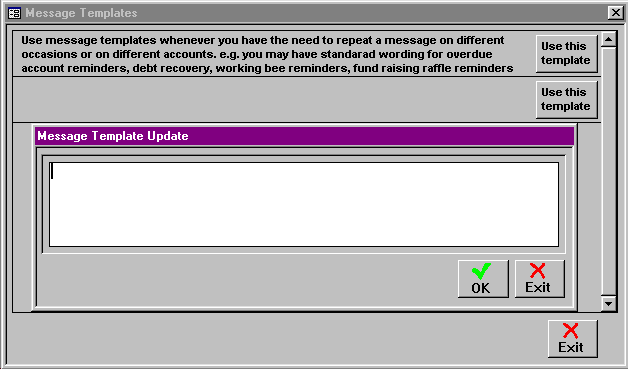
Type in the message that you wish to create as a Template.
Select OK.
Click on EXIT.
Broadcast this message to appropriate accounts as above or click on EXIT.