10.2. Create a New Account
Select BOOKING+BILLING / ACCOUNT
Select NEW
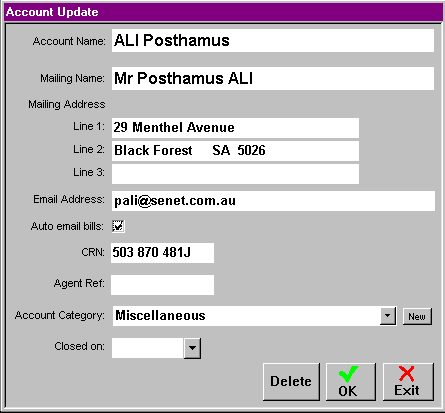
This brings forward the ACCOUNT UPDATE screen.

Type the account details as requested.
When the account holder is an individual,(rather than an organisation) you need to type the surname first. It is good practice to type this name in capitals with given names in upper and lower case. The Mailing Name is the name that appears on the bill, it appears by default after the account name has been typed and entered, but you may prefer to amend this to a more polite form, using Dr., Mrs., Mr. etc.
If applicable, enter an email address for this account.
If an email address has been entered, place a tick in the AUTO EMAIL BILLS check box.
Enter the Family CRN for this account as soon as you have it.
REMEMBER! If NO Family Customer Reference Number is entered in the account, NO Child Care Benefit will be paid.
If applicable, enter the Agent Reference for this account.
Note: An Agent Reference would be used if families pay by direct credit through their bank. This number needs to be quoted to allow you to identify which account holder has paid.
Select OK
Alternatively, you can create a new account at the same time as attaching bookings.
Steps to: Establishing an Account with bookings
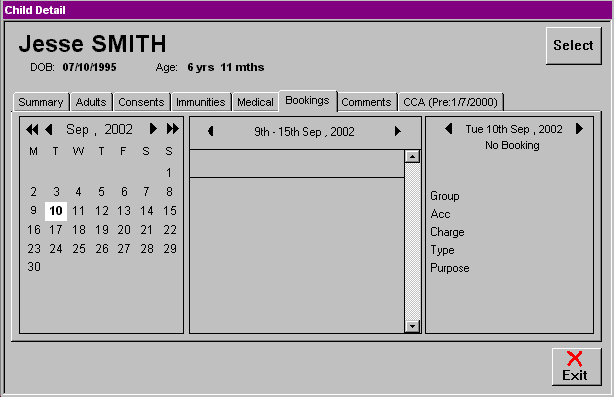
Select BOOKING+BILLING / CHILD from the Pull Down Menu at the top of your screen.
From the draw-down list in the Child screen, select the name of the child for whom you wish to enter bookings.
Select the BOOKINGS Tab.

From the calendar view on the left of the screen, select the commencing day of the booking period.
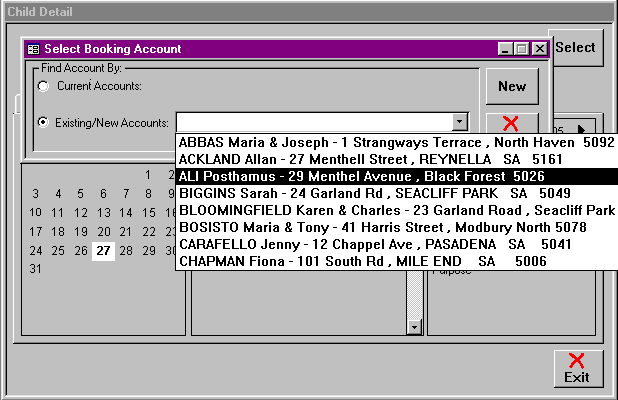
To bring forward the SELECT BOOKINGS ACCOUNT edit screen, either:
Double click on the date on the calendar.
Double Click on the Blank Railway Line in the middle section
Double Click in the box on the right hand side of the window.

Select Existing/New Account Radio Button.
If the booking is to be charged to an existing account with the service, eg. you have already entered child's sibling and they are to be paid for by the same account, use the Draw Down Selection List arrow to choose the account holder.

If you need to create a new account holder, select NEW, and this brings forward the ACCOUNT UPDATE screen.
Enter the account details as from 'Step 3' of the Steps to: Create a New Account outlined above.
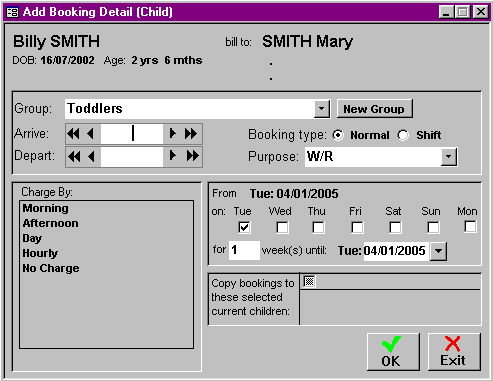
Click on the OK button, this takes you to the ADD BOOKING DETAIL screen.

Now you can add or select bookings to be paid for by this account. See Chapter 8.2.3 'Enter a Child's Bookings'